Sometimes it's really hard to keep up with all those different servers in your eco-system. Whether you are a hoster, an agency with lots of different testing servers or just a very motivated freelancer. Wouldn't it be great to have 1 single source of truth when it comes to IP addresses and available systems? Node Discovery with Consul solves your problem!
Let's face the truth! The more you gain experience with servers, the more you certainly have! A growing number of systems, means an increased level of required security for your nodes.
No matter if you use NAGIOS, RUNDECK, or any other tool to monitor and maintain your servers, they all have one thing in common. They usually need a list of nodes and their IP addresses. And if it's not about a tool, then it's still a great thing to have an always up-to-date list of your servers.
So your task is clear and easy:
Get a single list of available nodes and their IP addresses!
Consul offers you exactly this.
In fact, it does even more, such as services discovery, etc. But today, we are only focusing on an easy plug'n'play setup to access the list of available nodes.
Things get tricky once you dig deeper, but this article is really only about an easy installation. We will also skip setups for firewalls and more (but please still use it).
For Consul, we will use a simple Docker setup with the official Docker images, but our client nodes will be configured directly on the host systems (even if you run Docker containers on these).
Let's get started!
Consul Master Server
We will now create a single Consul master node. For this we obviously need a new server…
Once ordered and running, please install Docker and make sure it's working.
Now all we need to do is, to create a "docker-compose.yml" file and configure our Consul container.
version: "3.0"
  services:
    consul:
      container_name: consul
      image: consul:latest
      ports:
        - "80:8500"
        - "8300:8300"
        - "8600:8600/tcp"
        - "8600:8600/udp"
        - "8301:8301/udp"
        - "8301:8301/tcp"
        - "8302:8302/udp"
        - "8302:8302/tcp"
      volumes:
        - "./consul/config.json:/etc/consul.d/bootstrap/config.json"
      command: "agent -server -config-file /etc/consul.d/bootstrap/config.json"
Consul needs a couple of ports for the handshake between the master and the client nodes. The UI, if used, is available with port 8500. We just map port 80 to it, so that we have a nice HTTP experience. Still, feel free to use HTTPS, NGINX proxies or anything that you need.
The other ports are used when a new client joins the master. The separation of tcp and udp entries is on purpose!
Last but not least, we use a bind-mount for our configuration file, and make sure Consul is started with server mode and with our mounted configuration file in the commands section.
Now to our configuration file in our sub directory "./consul/config.json".
This one contains everything we need for our data center.
Please provide a name for it, use your public host IP of the server as advertise_addr and also assign your encryption token.
{
  "datacenter": "my-data-center",
  "data_dir": "/var/consul",
  "bootstrap": true,
  "server": true,
  "ui" : true,
  "encrypt": "xxx",
  "client_addr" : "0.0.0.0",
  "advertise_addr" : "x.x.x.x"
}
But hey?! Where do you get the encryption token from?
The encryption token is basically the password to access the data center. But you can't just paste any string in there. It has to be created by Consul. And this is what we have to do now with the initial setup.
docker run consul:latest keygenAlright, now that we have our token, just paste it into the configuration file and finally start our Docker container.
Congratulations, your Consul master should now be up and running. You should be able to access it with HTTP with your IP or domain if that is set up as well.
If Consul is not correctly starting, you can always see the log output to get more information about any configuration problems. Just use "docker logs consul" with our sample.
What to consider when it comes to firewalls? In general, always be aware of the troubles with Docker, UFW and IPTABLES. This means, that Docker ports might still be exposed, even if UFW would block it. Please google DOCKER-USER chain for more on that, because this might be a lot and is really out of scope here :)
But once accomplished (in any way), here are the ports that need to be accessed by the clients when joining your consul data center.
8600, 8300, 8301, 8302You don't need to do this now, you can just continue at your own risk ;)
Add your first client node
It's finally time to add your first client node to our data center. So again, order a new server or use an existing one.
Afterwards we need to install Consul on that server. This installation script is based on UBUNTU 20 (it should be 20, i think…at least it's Ubuntu).
curl -fsSL https://apt.releases.hashicorp.com/gpg | sudo apt-key add -
sudo apt-add-repository "deb [arch=amd64] https://apt.releases.hashicorp.com $(lsb_release -cs) main"
sudo apt-get update
sudo apt-get install consul
Once installed, you can already join your data center with this command.
sudo consul agent -retry-join "x.x.x.x" -bind=0.0.0.0 -advertise=$(hostname -I | cut -d' ' -f1) -datacenter="my-data-center" -encrypt="xxx" -data-dir=/var/www/src/consulUse the Consul master for the -retry-join, the correct data center name and the encryption token. The advertise IP address should already be extracted from the hostname command.
Especially the advertise IP is important, because this is the one, that will be used inside Consul to show the public IP address of this node.
Keep in mind, that this one-liner will not use an additional configuration in this article, although possible. So things like used services are not transmitted, only our basic node and IP address.
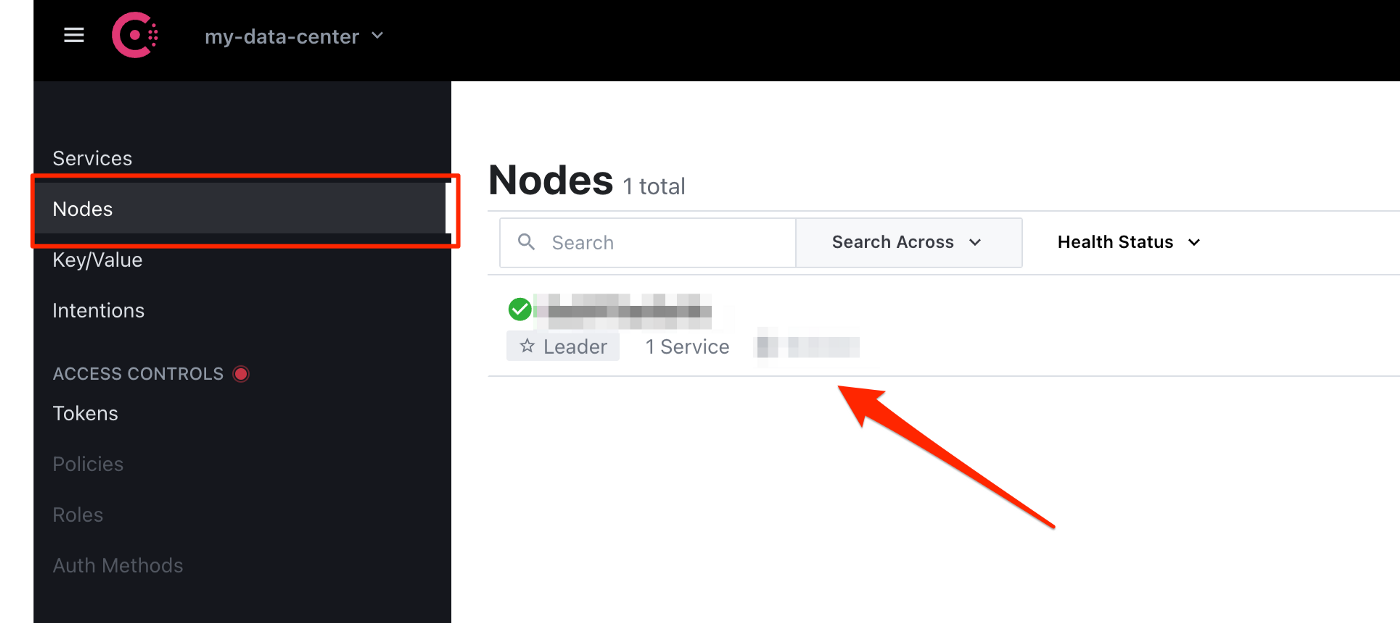
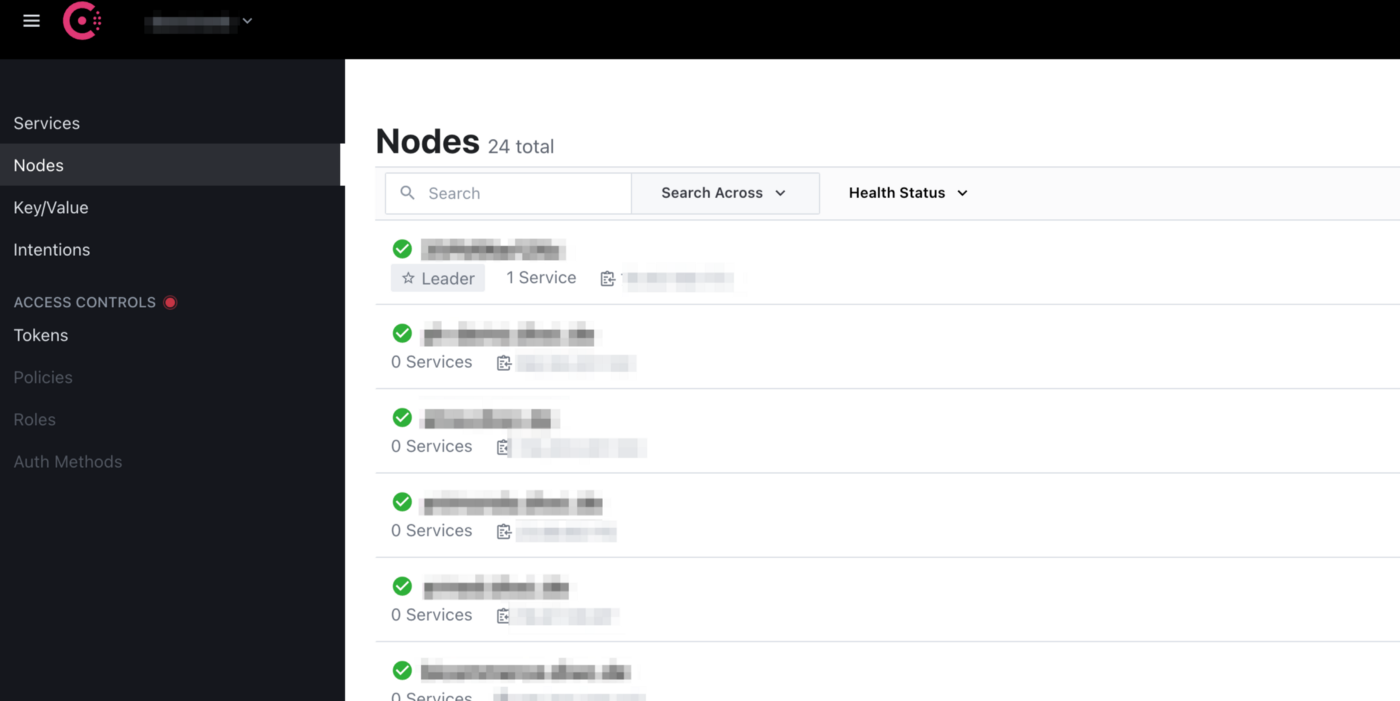
If you have done everything right, you should now see your new node in the web UI of Consul. Congratulations on that!
If you still want to improve things, I would again recommend playing around with the firewall. Make sure to only allow incoming calls on these ports from your Consul master IP (if you want)
8300, 8301, 8302If you now use things like Puppet, or anything else to create new servers, you probably want to auto-start the joining process. This is the reason why it's just based on a one-liner in my sample. The easiest approach is to just create a cronjob. Join every x minutes (it will only work the first time anyway). But also other, probably better approaches are possible, like boot scripts, supervisord or whatever you come up with. That's up to you!
Fetching Nodes with API
It's finally time to use your nodes for automation! Some systems might already have plugins for a Consul integration, but if not, you can always just call the API on your own, and do your magic by generating your own configs ;)
So why not just generating a resources.yml for Rundeck? Or other applications?
Here is a PHP based script to fetch the available member nodes of your consul master. It should help you to get started.
Just provide the URL with the encryption token, and you're good to go.
$url = 'http://consul.mydomain.com/v1/agent/members';
$encyptionToken = 'xxx';
$headers = array();
$headers[] = 'X-Consul-Token:' . $encyptionToken;
$ch = curl_init();
curl_setopt($ch, CURLOPT_URL, $url);
curl_setopt($ch, CURLOPT_HTTPHEADER, $headers);
curl_setopt($ch, CURLOPT_RETURNTRANSFER, true);
$result = curl_exec($ch);
curl_close($ch);
$nodes = json_decode($result, true);
The output is an array of all nodes with their name, status, IP address and more interesting information.
Conclusion
This was a very easy plug'n'play option to use Consul for node discovery.
Always keep in mind, this is just a very small range of things you can do, but it helps a lot to have a single list of available nodes, including options to fetch these with any programming language.
Keep security in mind, and you'll be very happy with Consul in your stack!