I'm a big fan of automation in general. May it be for development, deployments or even testing. It is indeed a possible solution for many cases, but when it comes to testing, please keep the following in mind:
Automation is not the solution to increase quality, but it's a great help to save time and reduce effort.
When we talk about testing automation, some people focus on scaling up their tests to be fully automated and try to get rid of manual work, while others try to only automate what makes sense.
My opinion is that automated tests can never remove the need of manual testing and are therefore only a helping hand in your overall QA process.
Focusing on the latter approach, it's a must-have that your testers are in full control of what happens. This means that testers should be using a test management software, and the actual results of automated testing frameworks should be sent to this software.
The final report in your management software will then contain a combination of manual testing results and automated ones.
But here is a difference when it comes to defining test runs. Will your automation framework create new test runs everytime it is executed? That would make sense, absolutely. On the other hand, your testers might have a prepared test plan with defined runs that you want to "fire" against. Neither is right or wrong, it's just a matter of what you need in the end.
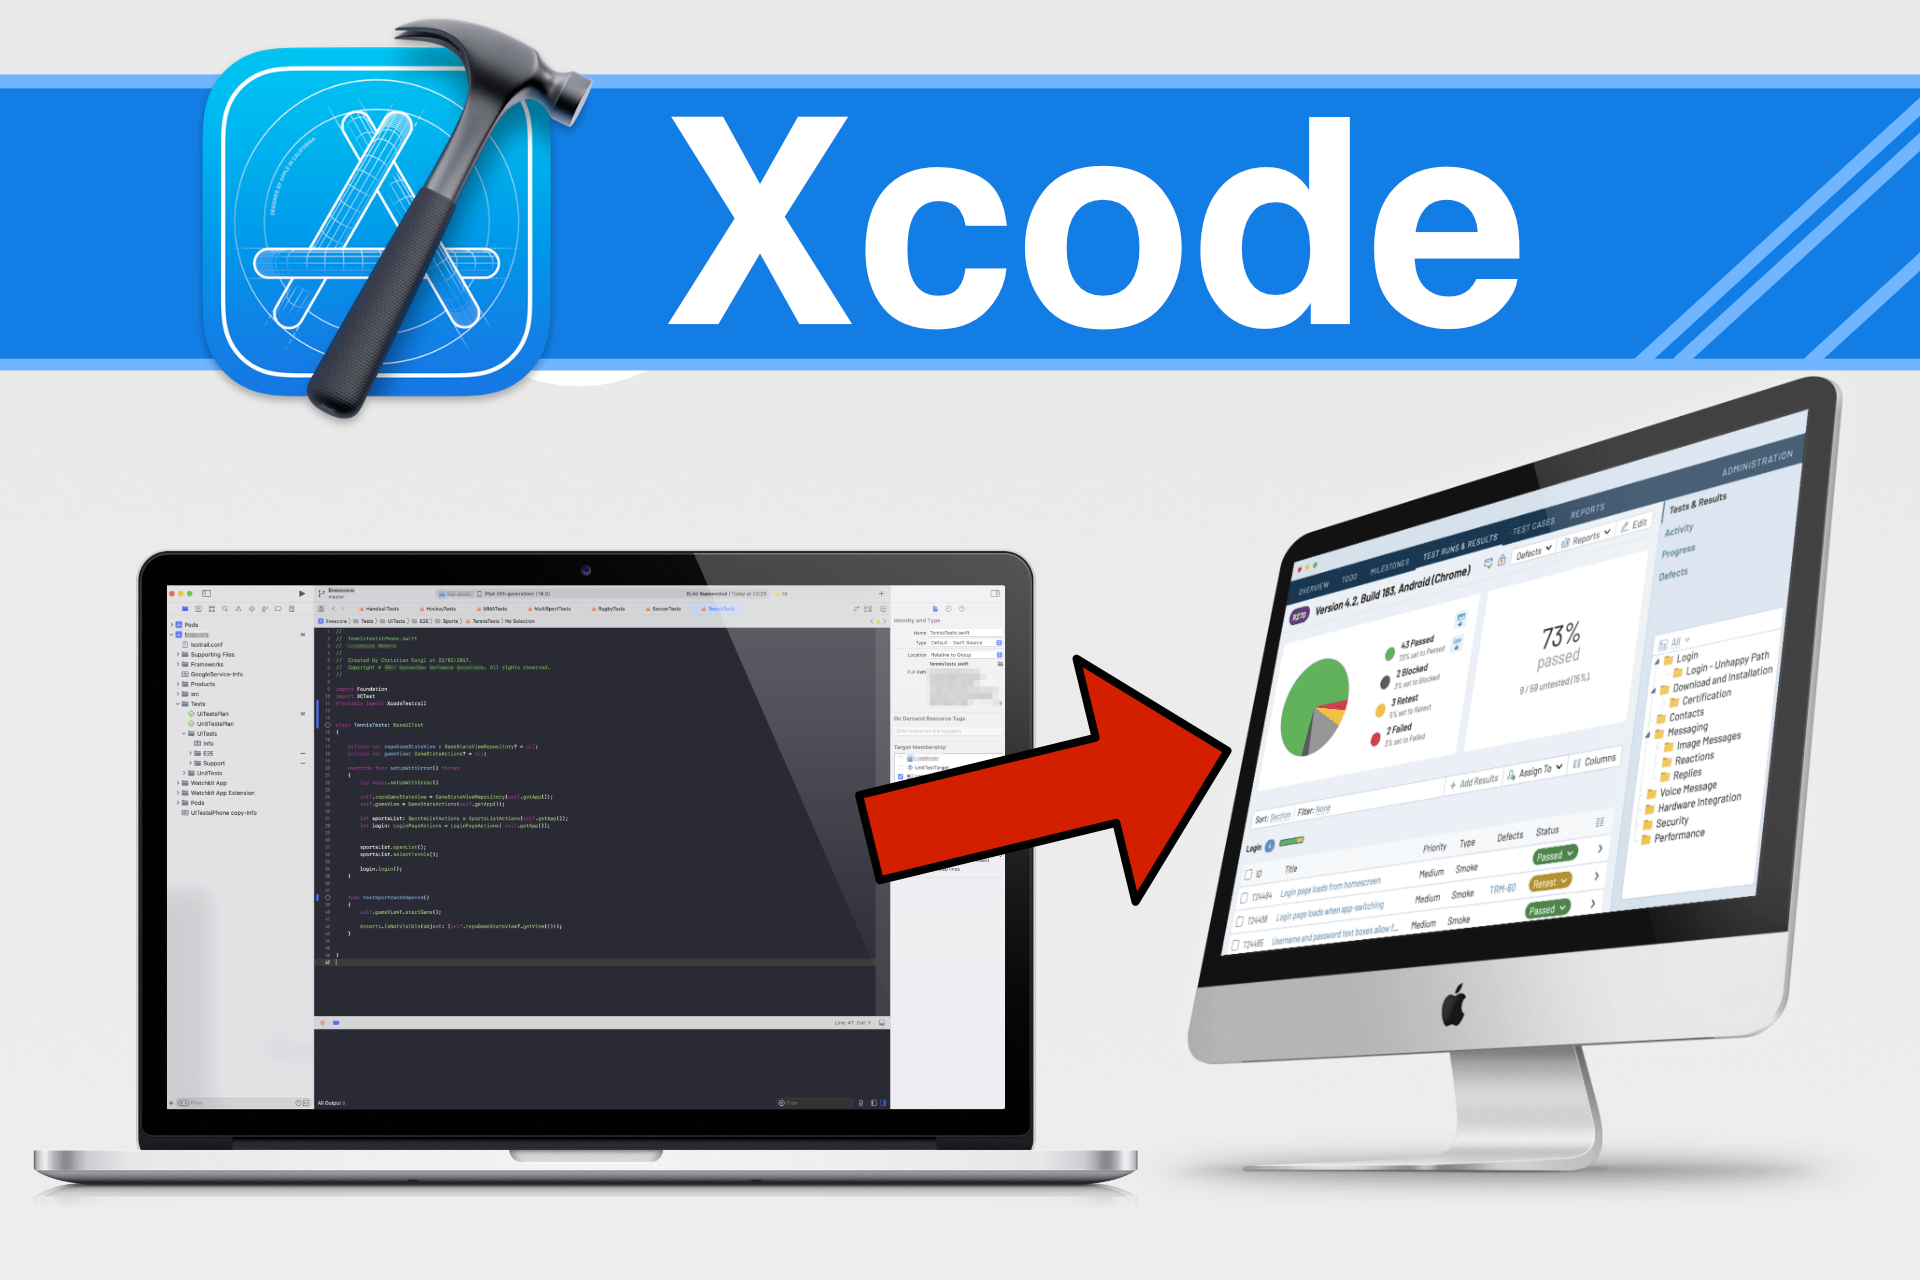
While lots of integrations focus on creating new test runs, I have indeed the need of doing it in a different way. So I've created a custom integration for Xcode and TestRail to do this.
This article focuses on explaining you this approach, the benefits and how to install and configure the integration.
But let's first start with the involved parties!
TestRail
TestRail (https://www.gurock.com/testrail) is one of the available test management applications out there. I like it because of its efficient look and feel, its features and the available API that lets you really get the most out of your processes and integrations.
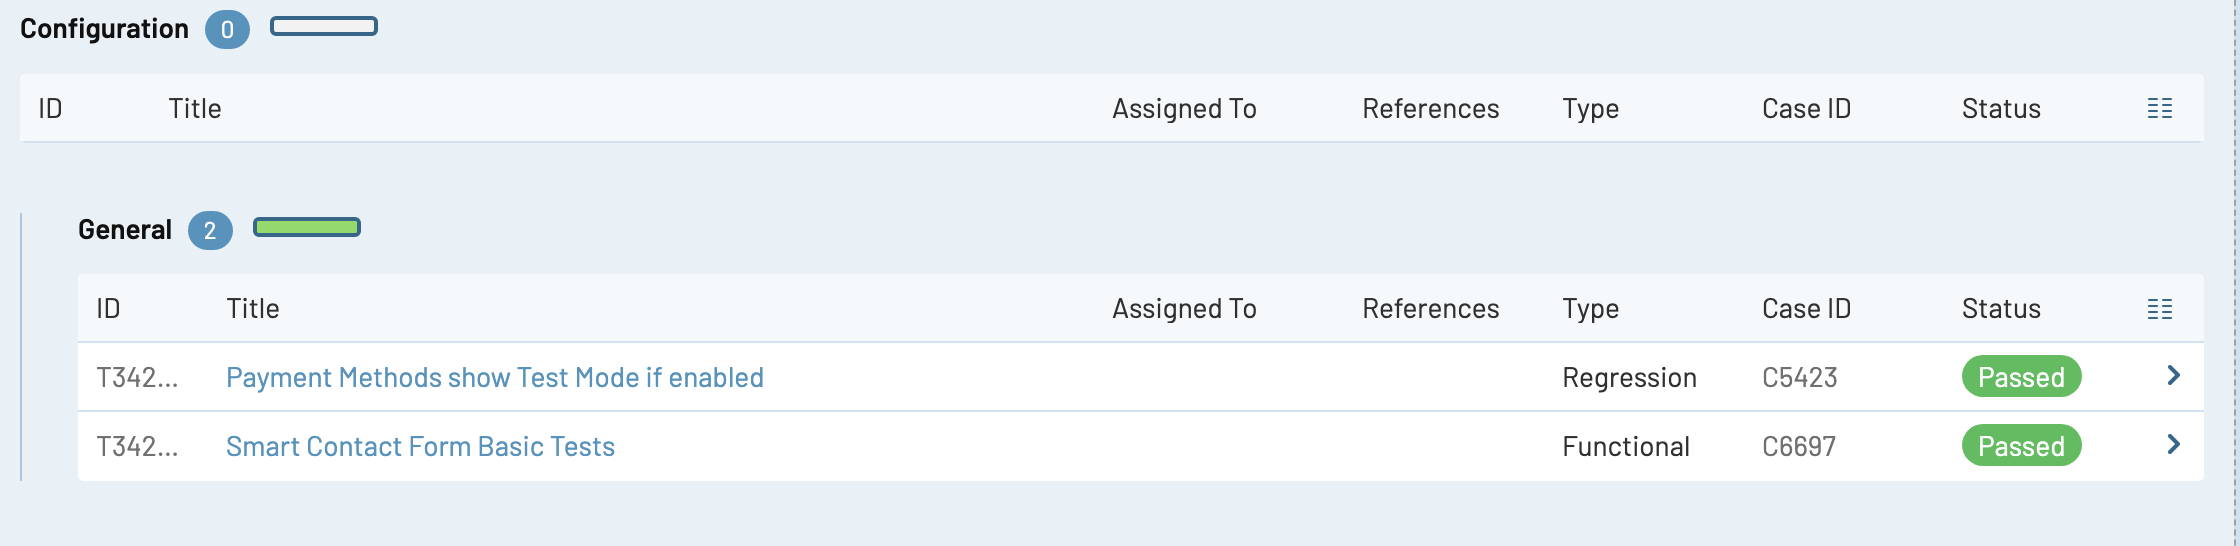
The basic concept is that you create test cases in your projects. Test cases are the list of available things to test in a project. These test cases can be structured with sections so that you have a better overview. Every test case has different properties such as type, automation type, reference IDs and more to allow you even more by filtering for what you need.
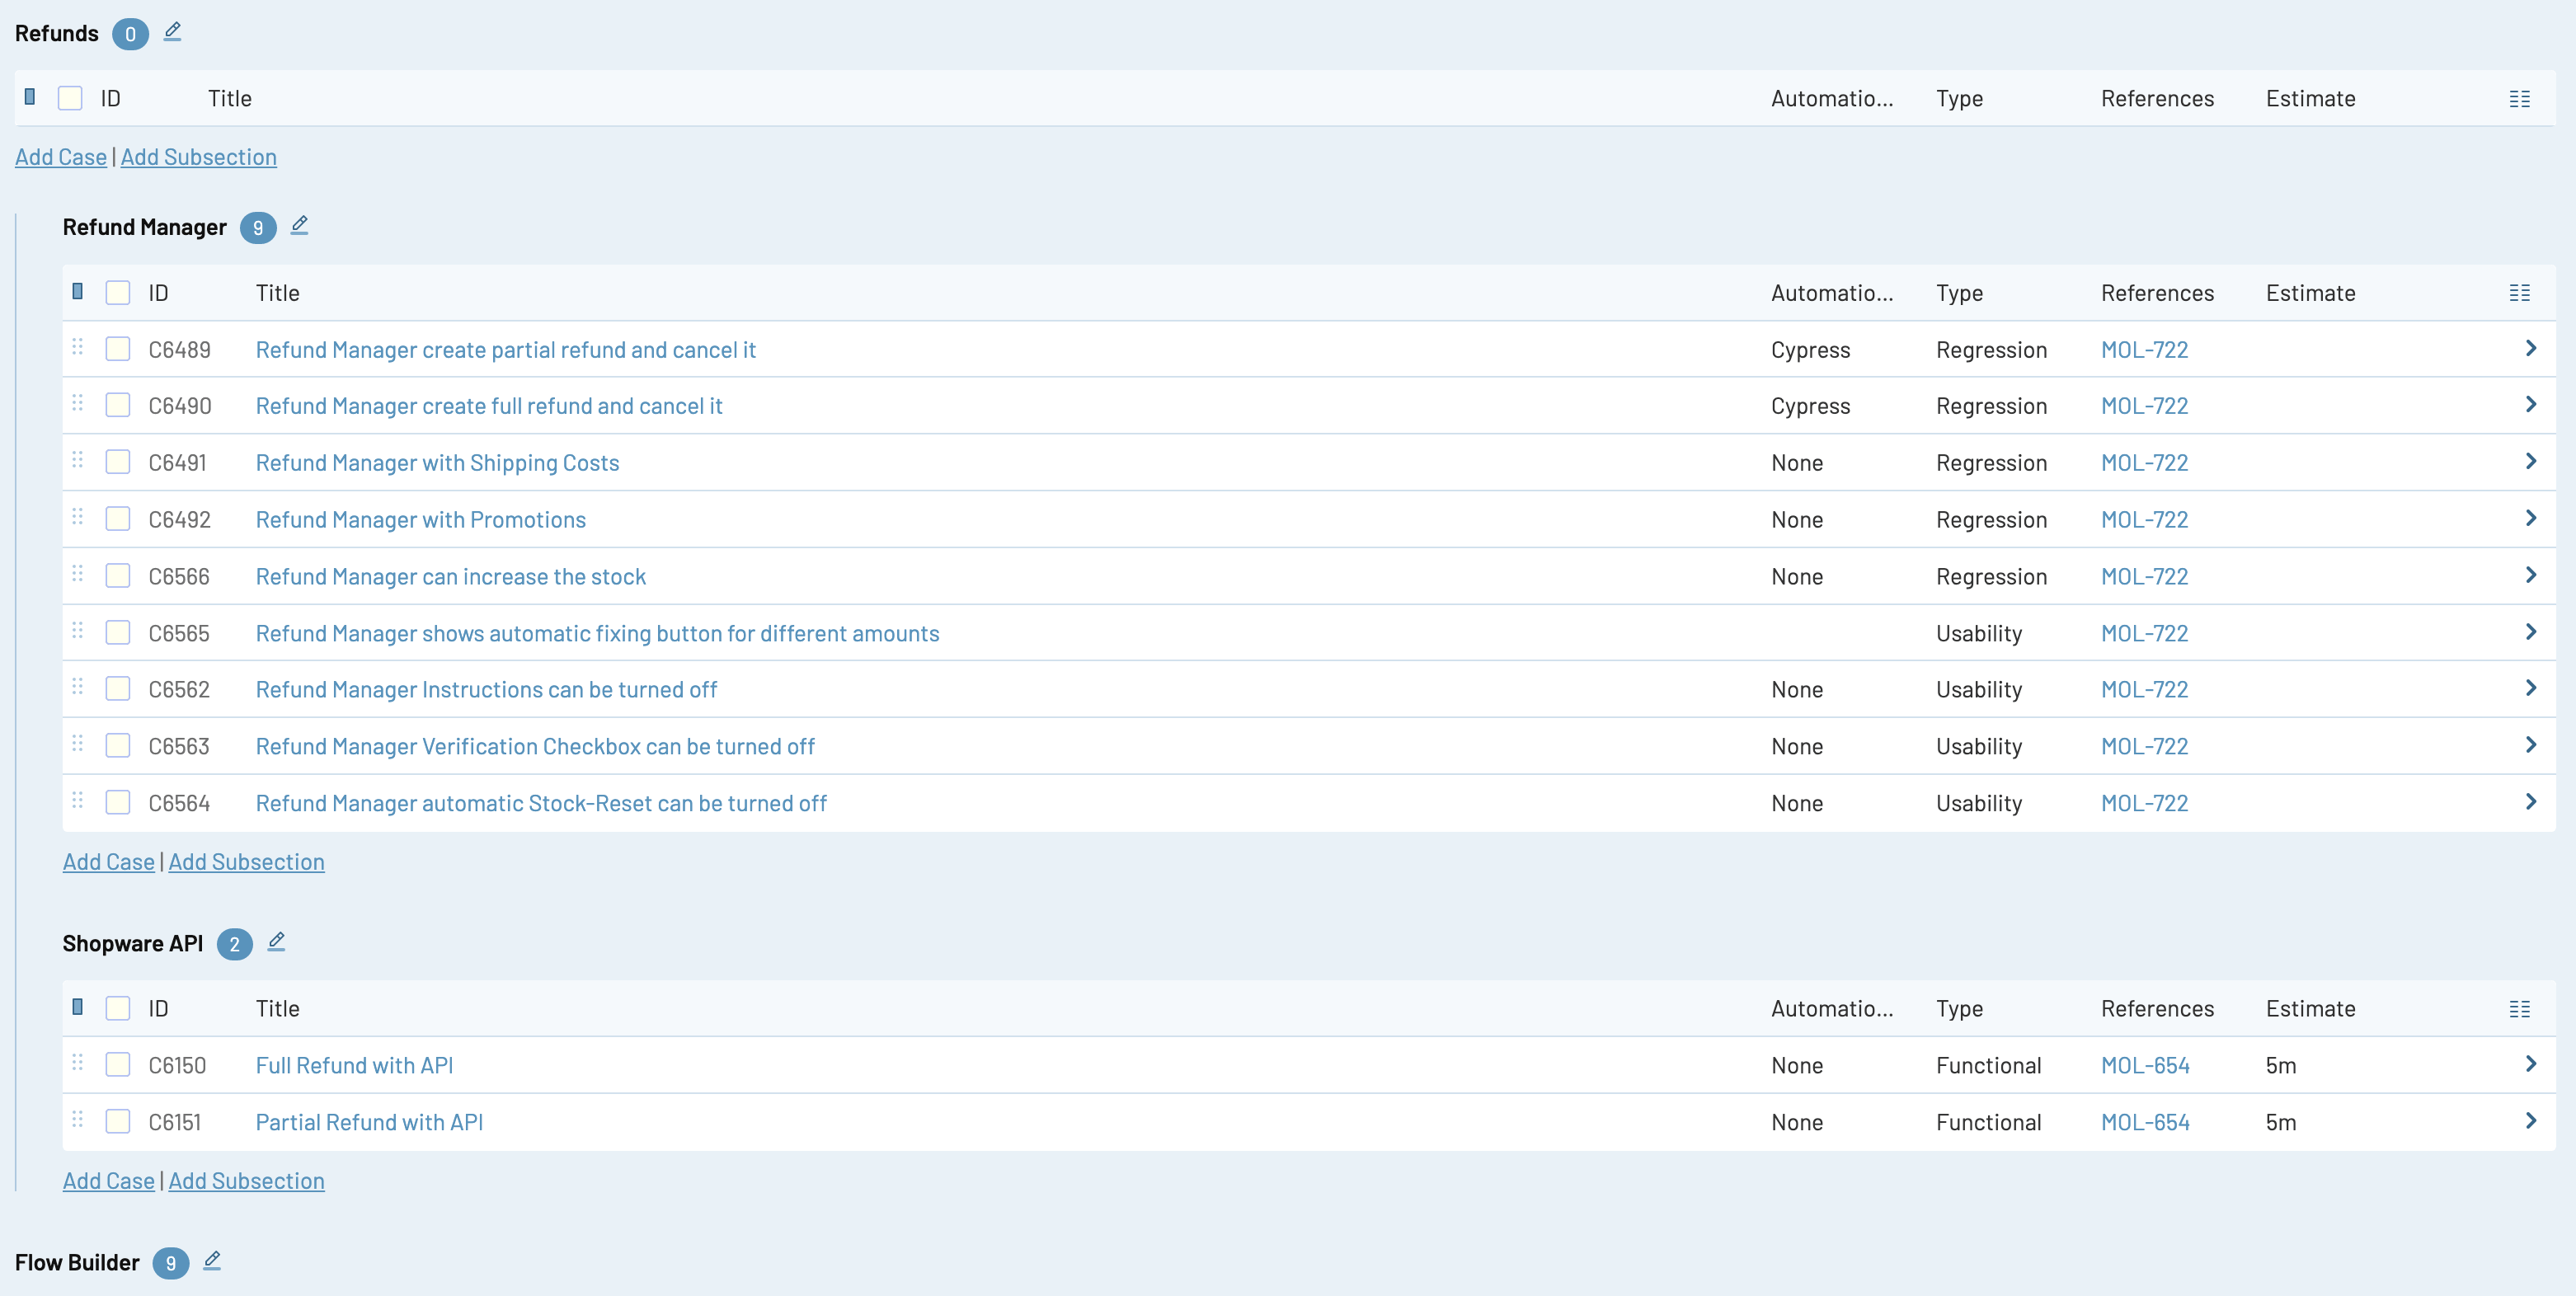
After your test cases have been prepared, you can use them in your test plans and test runs. A test plan contains multiple test runs.
And this is where it starts to get tricky.
Creating a concept on how you test in a project really depends on your skills, the project itself, budget, capacity and way more. If you have experience in that, or even have the ISTQB certificate, you know what I'm talking about.
In projects that need to be more efficient, and where controlling is not that important, I've figured out that long-running test runs are better than starting a new run everytime I (re)test.
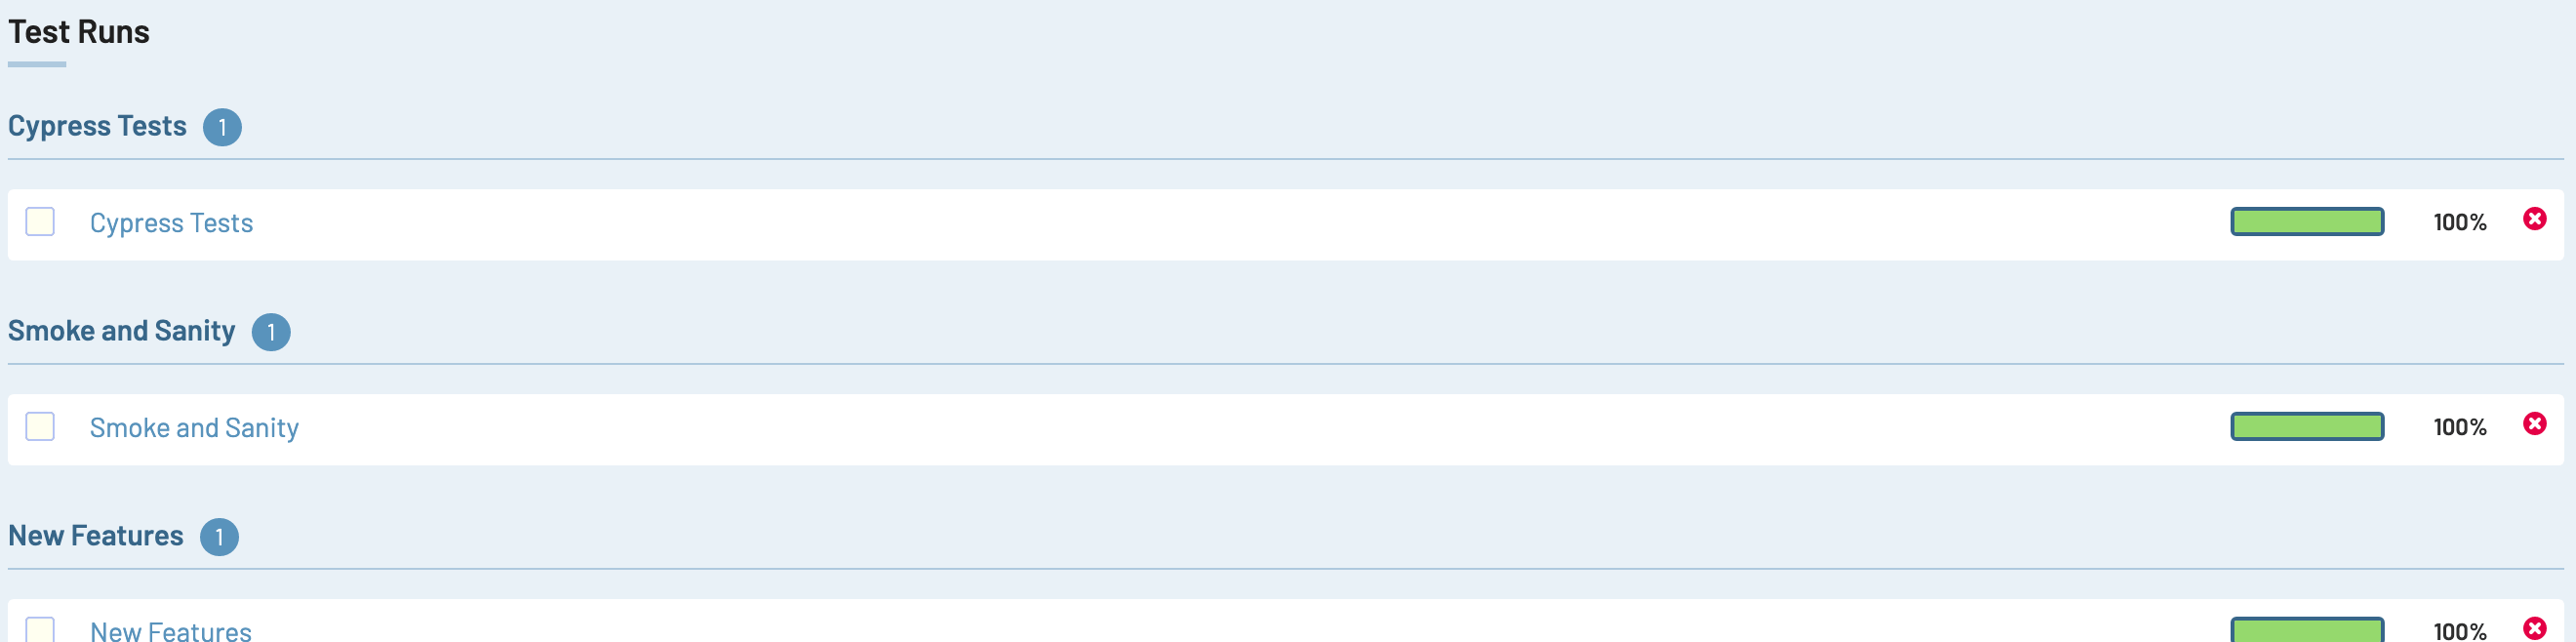
So in TestRail I usually create a new test plan, and then add separate test runs that should all be green before I release. Why separate ones? Because I want to have the separation visually in my plan. There is a test run for the automated tests, another one for "Smoke and Sanity", and then maybe for regression tests, new features and more.
The runs include required test cases and are either chosen by using filters or by simply selecting specific test cases that I need.
When testing starts, I can just open a test run, read the instructions and add a new result, such as passed, failed, and more. Depending on your defect management, you can then proceed by pushing defects to Jira for instance. But this is a totally different story.
While I could easily test every test run of our plan manually, I can also start to outsource these. And I think the best one would be to let a system test some of our test runs, right?
Test Automation Frameworks
When deciding on a framework to automate your test cases, please pay attention to what you really need for your business.
What programming language do you prefer? Do you need CI/CD options? What is the most stable framework for your projects (yes, you really need to try it!). And also, what do you actually want to test? And what platform?
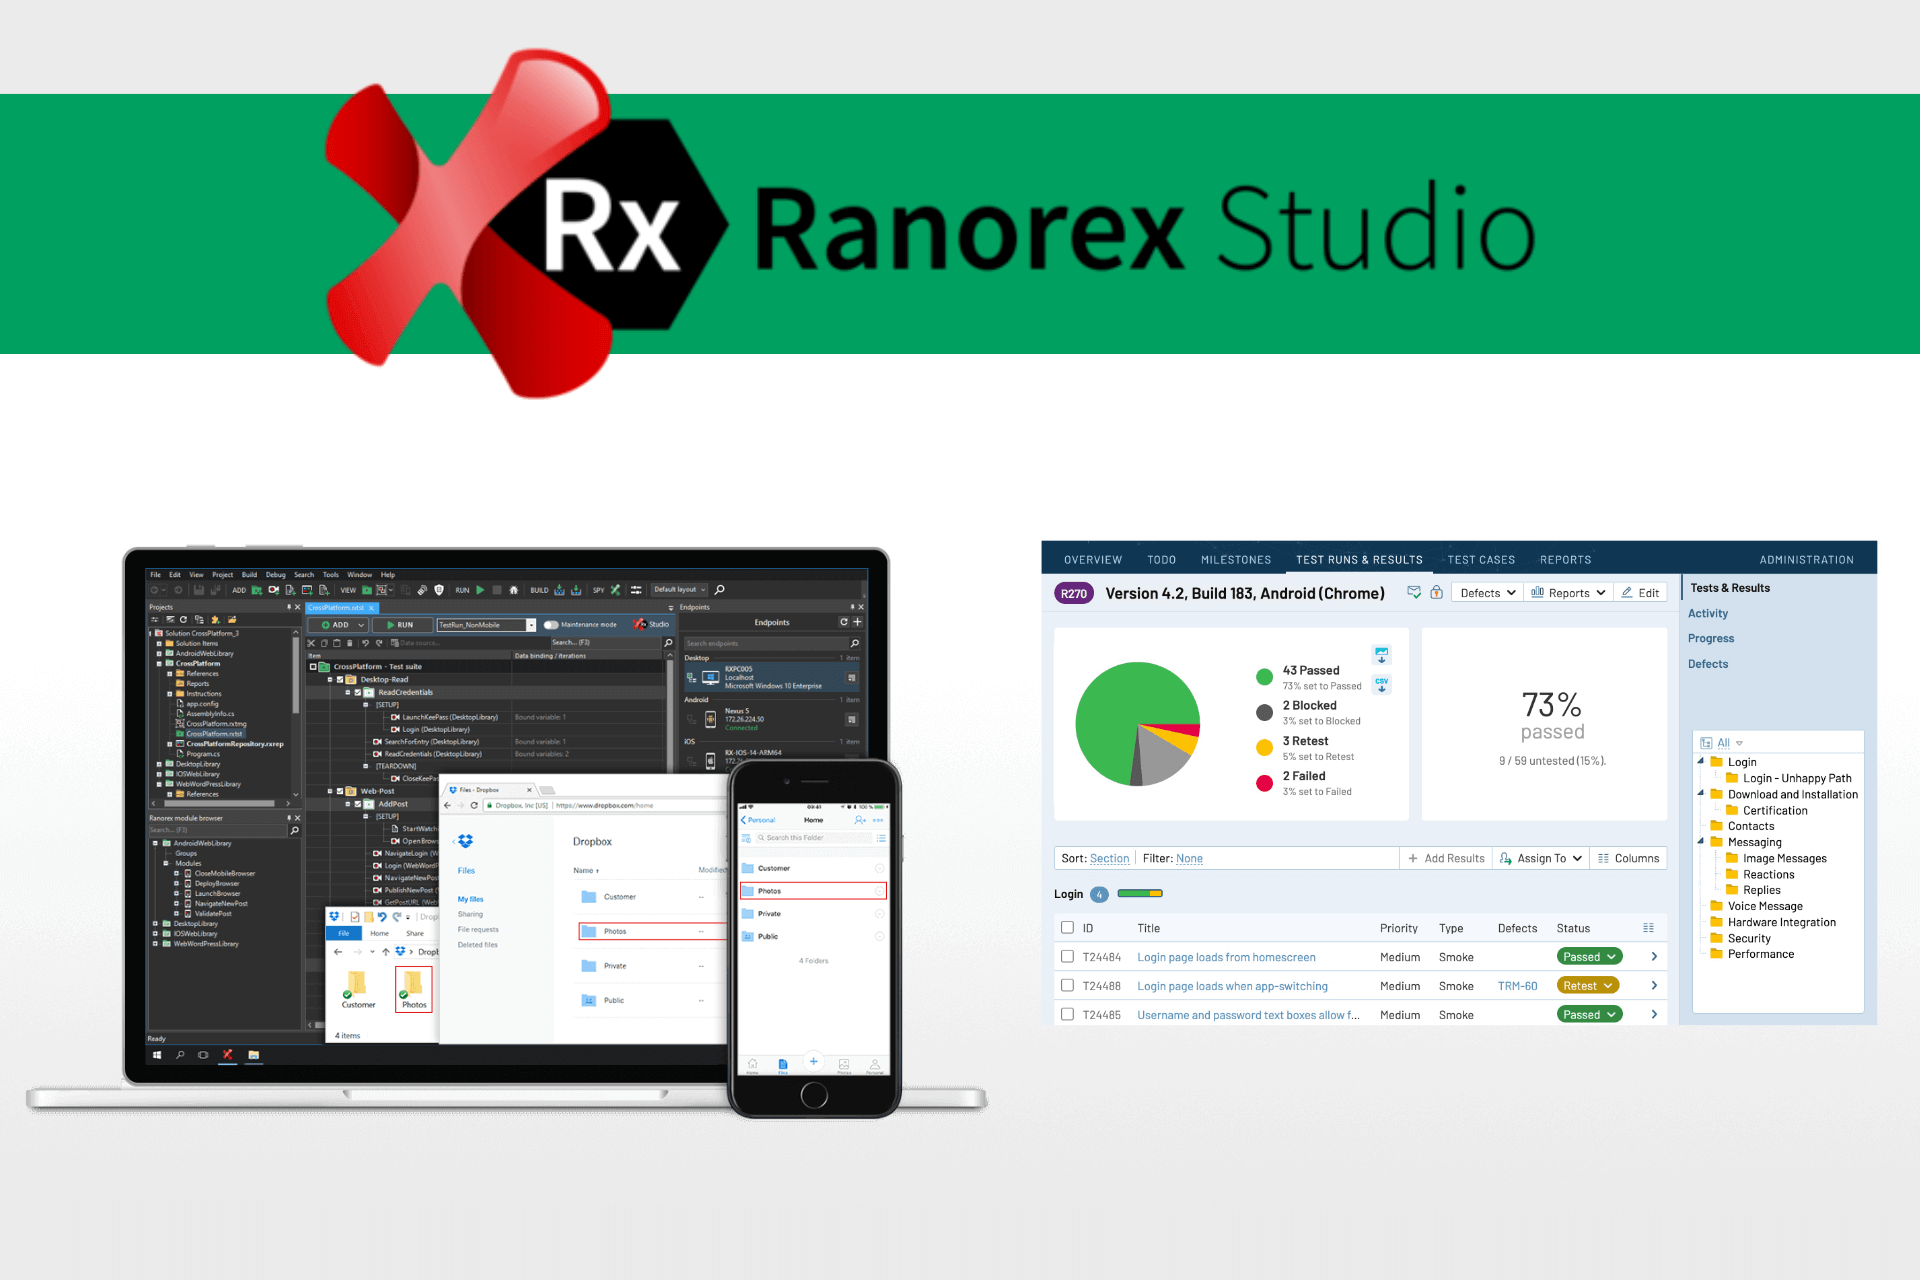
I've reduced my stack to 3 basic frameworks that I like very much. For web related things I use Cypress, for Windows I use Ranorex, and for Mac/iOS I use Xcode.
And especially when it comes to testing iOS applications, there is just no way around Xcode.
Xcode
I don't think I have to say much about Xcode - it's just THE IDE for Mac and iOS.
While it comes with all kinds of development stuff, it also ships with an advanced Test Plan functionality,
where you can plan and run full UI Tests based on XCTest classes.
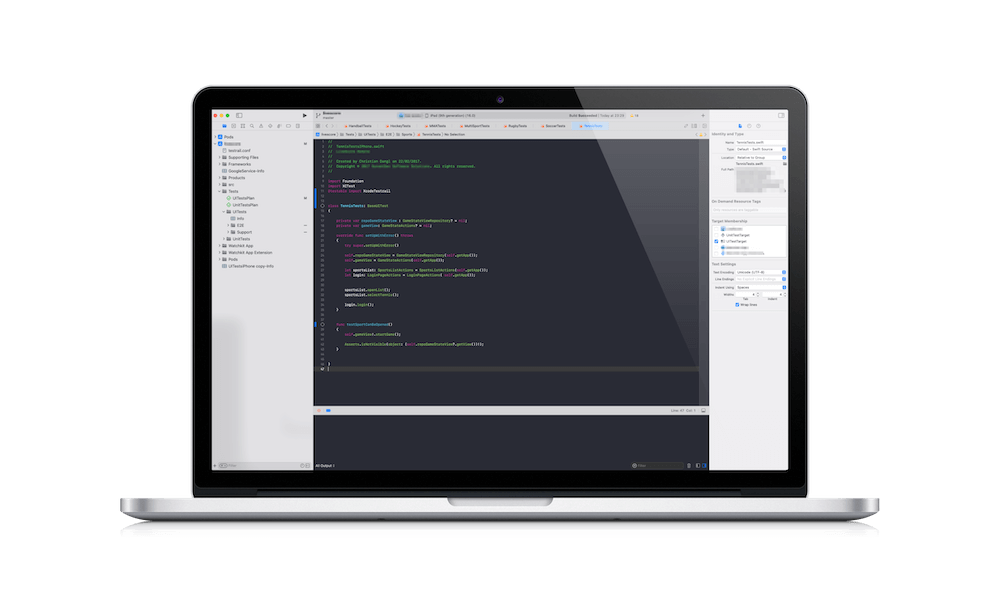
Tests are built using Swift, or even Objective-C, if you are still working with the old programming language.
The XCTest classes work with a XCUIApplication object, that acts as your application under test. You can modify launch arguments, as well as certain properties of the simulated device.
The XCUIApplication instance is then used to find specific elements, such as buttons. These elements allow you an interaction, just like pressing a button by using the tap() function.
Assertions are done based on the XCTAssert functions.
public func testLogin() throws
{
    self.app.otherElements["btnLogin"].tap()

    XCTAssert(self.app.navigationBars["Account"].exists)
}
Tests can then be started either from the Xcode UI, or by using a CLI command.
When you start a test, you always have to chose the device you want to use from the simulator, as well as the OS version for the test run.
xcodebuild test -workspace xxx -scheme xxx -testPlan MyUITestsPlan -destination 'platform=iOS Simulator,name=iPhone 14 Pro,OS=16.0'Xcode TestRail Integration
To integrate Xcode with TestRail you need to add a plugin or module to your Xcode project. That plugin should then communicate with the API of TestRail and send the results from Xcode to TestRail.
And because I love to develop things, I did such an integration for you.
You just need to install it and configure your TestRail credentials in a testrail.conf file.
Then set the run ID that you want to fire against.
And when it comes to your test cases (yes they need to be mapped), just add the TestRail Case ID to your tests.
That is everything, easy right?! Let's check it out together.
If you use something other than Xcode, just look at my Github page. I do have more integrations available.
Use the Xcode TestRail Integration
1. Installation
This integration is available through CocoaPods.
You usually only need to install the integration for your test targets. Open your podfile and add this to your test target.
target 'MyTestTarget' do
    pod 'XcodeTestrail'
end
Then just install your pods.
pod install2. Setup TestRail credentials
Now configure your credentials for the TestRail API. Just add this snippet in a testrail.conf file in the root directory of your project.
Please keep in mind, the RUN_ID is always the test run, that you want to send the results to. You can find the ID inside the test run in TestRail. It usually starts with an R, like "R68".
TESTRAIL_DOMAIN=xxx.testrail.io
TESTRAIL_USER=xxx
TESTRAIL_PWD=xxxx
TESTRAIL_RUN_ID=161
3. Register Plugin
Just register the TestRail integration in the setup of your test files. Also make sure to import the module with the @testable keyword, otherwise the classes will not be found!
There's nothing more besides this, to register the TestRail reporter.
@testable import XcodeTestrail

override func setUpWithError() throws
{
    try super.setUpWithError()

    TestRail().register();
}
4. Map Test Cases
We're almost done. You can now map TestRail test cases to your Xcode tests.
Please use the TestRail Case ID as a suffix inside the Xcode test title.
The plugin will automatically extract it, and send the results to your test run in TestRail.
The case ID needs to be at the end and separated with an _ from the rest of the title.
public func testMyFeature_C6437()
{
    // ...
}
5. Start Xcode Tests
Start the Xcode Test Suite and enjoy watching Xcode sending results directly to TestRail while the tests run.
CI/CD Pipelines
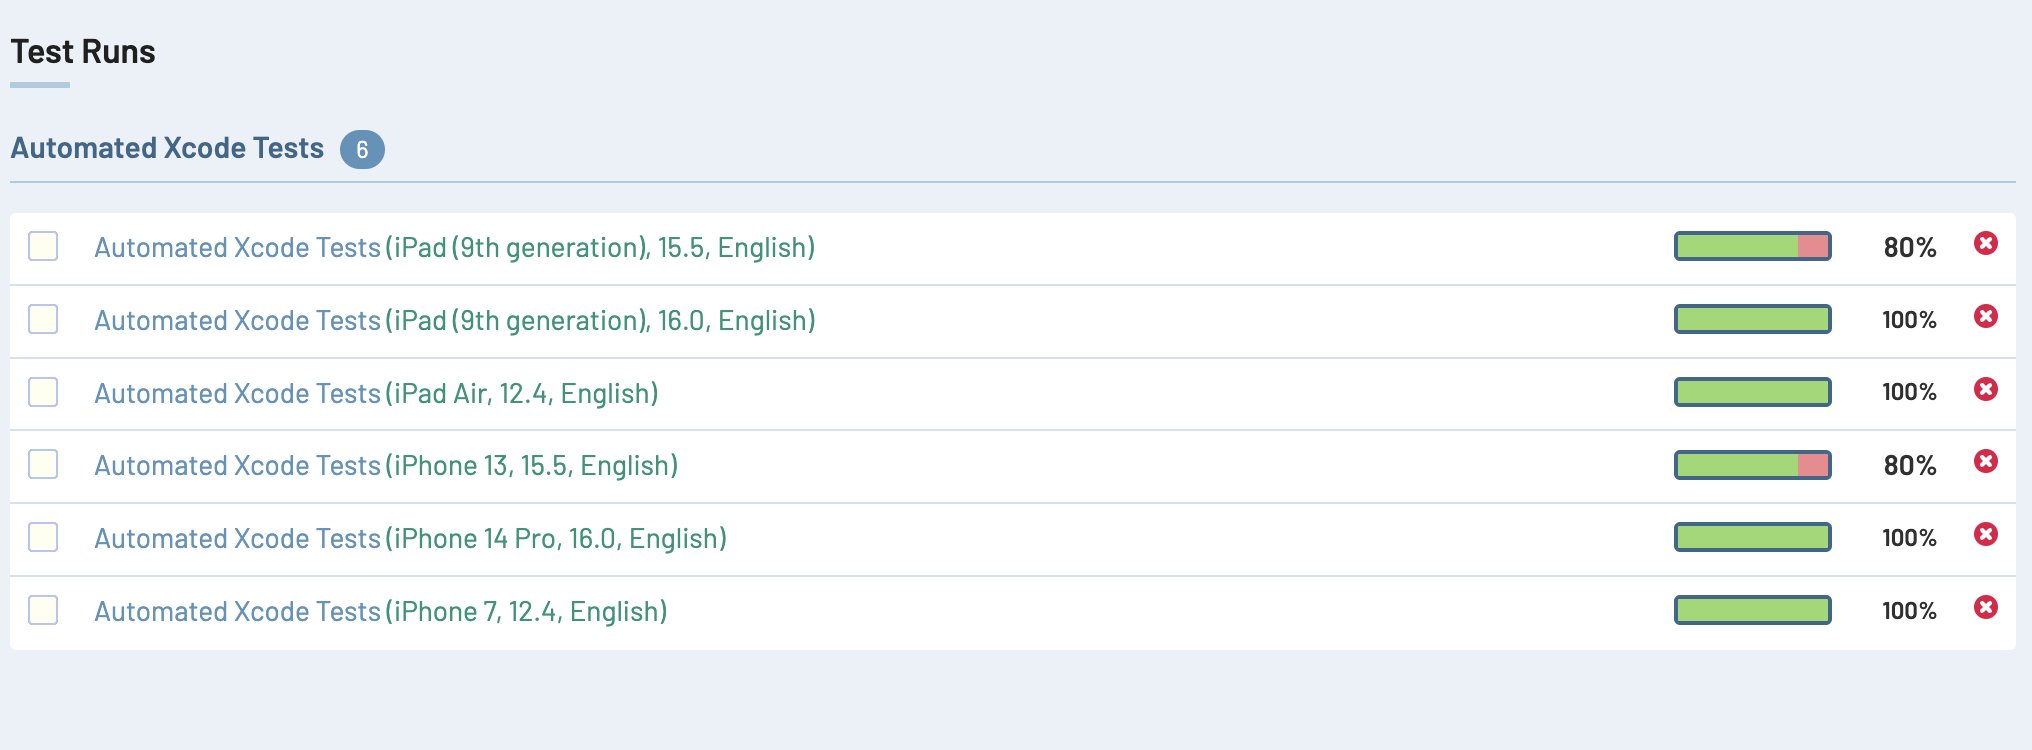
It's also possible to run the integration within a CI/CD pipeline. In most cases you probably want to create separate test runs for different devices.
I would recommend creating a Test Plan in TestRail. This plan can then contain different test runs for every device.
In your pipeline, just create a testrail.conf file and fill it with the RunID of the specific device test.
You can either create the full file dynamically, or maybe create a template that comes without a run id. In that case we simply copy the template before we start the test, and then add our specific run id.
# template.conf
TESTRAIL_DOMAIN=xxx.testrail.io
TESTRAIL_USER=xxx
TESTRAIL_PWD=xxxx
# copy template before a new device test
cp ./template.conf src/testrail.conf
# assign our iPhone 14 Pro (iOS 16.0) Run ID for our Release Plan in TestRail (R166)
echo "TESTRAIL_RUN_ID=166" >> src/testrail.conf
# start our Xcode tests for iPhone 14 Pro, iOS 16.0
xcodebuild test -workspace xxx -scheme xxx -testPlan UITestsPlan -destination 'platform=iOS Simulator,name=iPhone 14 Pro,OS=16.0'It's a wrap
I hope this article helps you to improve your Xcode and TestRail experience. If you have questions, ideas or feedback, just let me know.
Here is the Github URL for the integration: https://github.com/boxblinkracer/xcode-testrail